
 EN
 ZH
 JA


LED Light Strip Connection Tutorial
LED strip connection failures are the silent killer of otherwise perfect lighting projects. Having spent twenty years in the LED strip industry, I’ve watched cross-border sellers ship products overseas only to face disaster at install: flickering, dead lights, even burning smells. For engineering procurement, it’s worse—dozens of meters installed, then nothing works. After repeated investigations, we found the strip itself is rarely the problem; the failure almost always happens at the connection. Loose connectors, undersized wire, under-rated power supplies, poor sealing—small details that become big headaches. That’s why at Mingxue Optoelectronics we treat LED strip connection as part of the product itself. This guide covers power-load math, routing, and solder vs solderless methods, end to end.
After repeated investigations, we found that the problem rarely lies with the strip light itself; instead, the issue usually arises during the “connection” phase.
Loose connectors, undersized wire gauges, insufficient power supply wattage, poor waterproofing—these small details might seem insignificant in isolation, but combined, they become major hurdles that lead to product returns and failed project inspections.
That is why, at Mingxue Optoelectronics, we haven’t just focused on manufacturing high-quality strip lights; we have also treated the “how-to” of connecting them as an integral part of the product itself.
How do you select the right power supply to avoid burnout?
How should solder joints be treated to ensure both structural integrity and weather resistance?
How do you choose a junction box that facilitates easy installation while preventing short circuits?
How do wiring methods differ across control protocols like PWM, SPI, and DMX?
We have dissected each of these issues and developed a comprehensive, end-to-end connection solution—covering everything from power supplies to wiring.
Today, I’d like to take this opportunity to share these insights with you. I hope this helps our cross-border e-commerce friends reduce after-sales headaches and gives our engineering procurement partners greater confidence that their lighting projects will pass inspection.
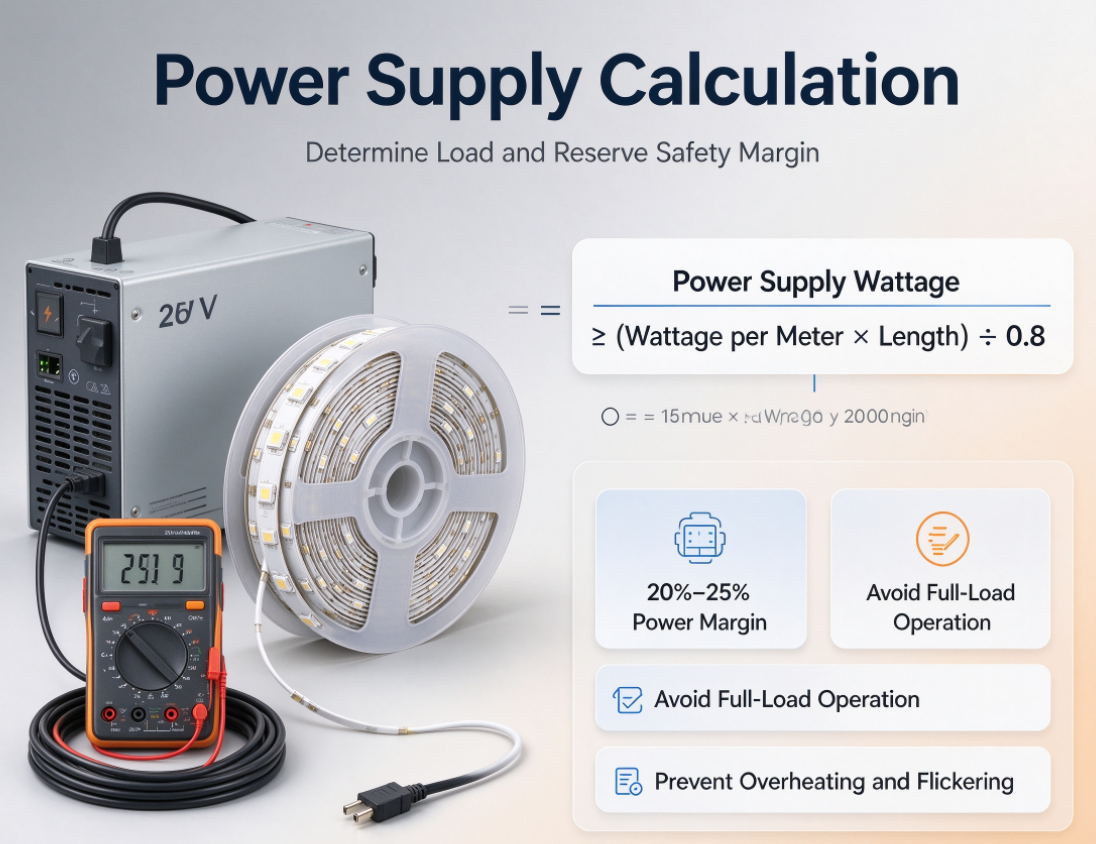
Phase 1: The first rule of any LED strip connection is calculation, not installation.
The first step in connecting LED strips is not installation, but calculation.
1.1 Power Supply Margin: When configuring 12V/24V low-voltage LED strips, never match the power supply wattage exactly to the strip’s total wattage; a safety margin is essential to prevent overloading the power supply.
1.2 Calculation Formula: Power Supply Wattage ≥ (Wattage per Meter × Length) ÷ 0.8.
1.3 Expert Advice: To handle the inrush current during startup, we always recommend maintaining a power margin of 20%–25%. Operating the power supply at full load for extended periods causes a sharp rise in heat, shortening the lifespan of electrolytic capacitors and directly leading to flickering in the LED strips.
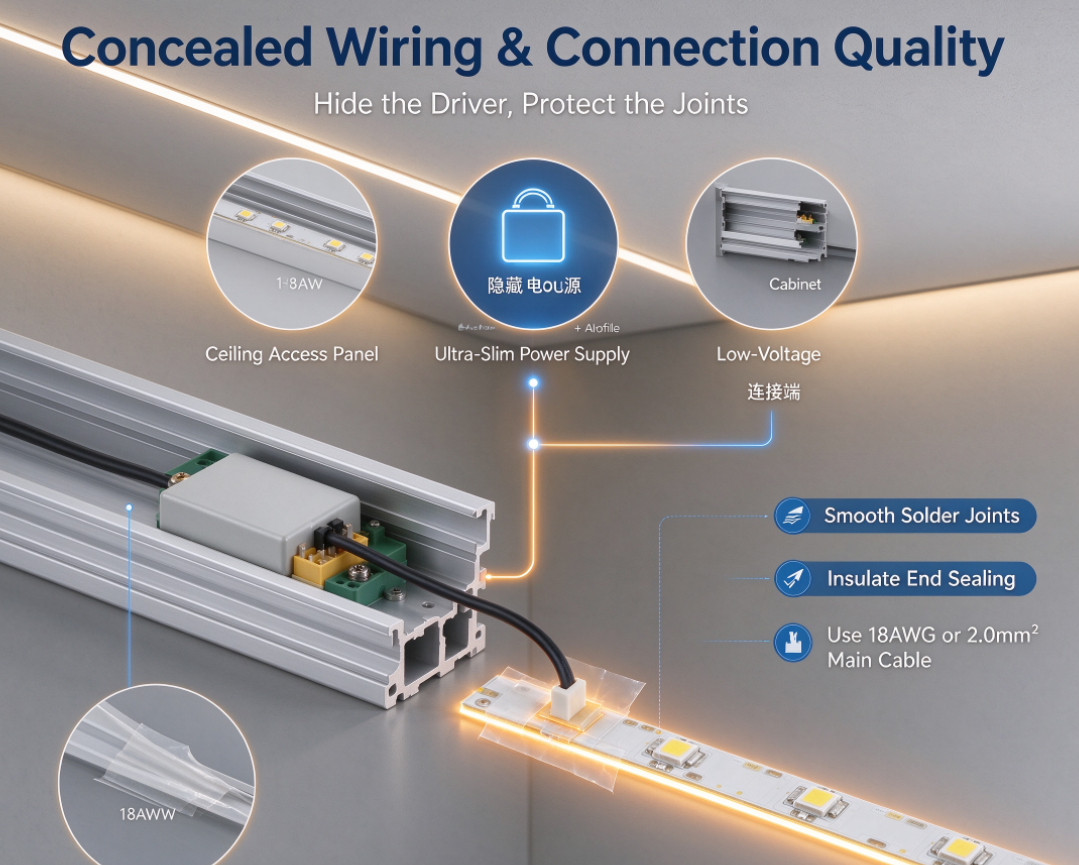
Phase 2: In LED strip connection, concealing the power supply is where high-end projects separate themselves.
The essence of high-end lighting projects lies in the principle of “seeing the light, but not the fixture—and certainly not the power supply.”
2.1 Three strategies for concealing power supplies:
2.1.1 Ceiling access panel: A traditional approach that facilitates future maintenance.
2.1.2 Ultra-slim power supply + aluminum profile: Utilizing an ultra-slim linear power supply concealed directly within the aluminum profile’s channel, achieving a truly integrated driver design.
2.1.3 Centralized power supply via low-voltage cabinet: In “no-main-light” designs for large apartments, power supplies are consolidated in a central low-voltage cabinet, with power transmitted over long distances using thicker 18AWG wiring.
2.2 Wiring concealment techniques: Utilizing 45-degree angled aluminum profiles to create dedicated wiring channels.
When channeling walls, use copper-core wiring with a cross-section of at least 2.0mm² for the main lines to prevent voltage drop during long-distance transmission.
Phase 3: The most failure-prone LED strip connection step is the physical join—soldering versus solderless.
This is the final step in the physical connection process and a common point of failure regarding contact reliability.
3.1 Industrial Grade: Solder Connection
3.1.1 Process Requirements: Solder joints on the LED strip must be smooth, rounded, and bright silver in appearance. Mingxue Optoelectronics’ production standards mandate the use of a constant-temperature soldering iron set between 350°C and 380°C.
3.1.2 Advantages: High mechanical strength and extremely low electrical resistance; connections remain intact despite thermal expansion and contraction.
3.1.3 Expert Tip: For high-end LED strips utilizing 2oz or 3oz rolled-annealed copper PCBs, heat dissipates rapidly from the pads. Soldering must be performed quickly, accurately, and steadily to avoid prolonged heating of the LED chips.
3.2 E-commerce Grade: Solderless Connectors
Since most retail (consumer-facing) customers lack access to soldering irons or the necessary technical expertise, solderless connectors are recommended for e-commerce products.
3.2.1 Transparent Snap-in Connectors: Ideal for DIY enthusiasts; easy to install.
3.2.2 Insulation-Piercing Connectors: Suitable for high-density 2835/5050 LED strips; connection is established by piercing the PCB’s copper layer, offering superior stability compared to standard clip-style connectors.
| Key Steps | Core Focus | Pitfall Avoidance Guide | Recommended Tools |
|---|---|---|---|
| Power Supply Side | Polarity & Load | Never reverse positive and negative polarity when connecting addressable LED strips, otherwise the IC chip will burn out instantly | Multimeter, 24V Constant Voltage Power Supply |
| Main Cable | Conductor Gauge (AWG) | Too thin wires cause yellowing at the strip tail. Power supplementation is mandatory for single-end runs over 5 meters | 18# wire / 2.0mm sheathed cable |
| LED Strip Solder Pads | Soldering or Quick Connector | Soldering the LED strip with a soldering iron for skilled users; quick connectors are available for regular customers | Soldering Iron, Industrial Heat Gun |
| End Sealing | Insulation Sealing | Seal the soldered LED strip ends with heat shrink tubing or electrical tape | Electrical Tape |
For high-standard lighting projects in 2026, the professionalism of the LED strip connection directly determines the quality of the final delivery. For cross-border e-commerce sellers, providing clear connection diagrams and calculation logic can significantly reduce negative reviews caused by wiring errors; for lighting contractors, standardized wiring and load redundancy serve as a guarantee for project acceptance.
Backed by a seasoned R&D team of 20 experts, Mingxue Optoelectronics not only manufactures high-quality LED strips certified by UL, CE, and SAA but also provides complimentary, comprehensive system connection designs. Whether you need to address voltage drop over long distances or require discreet control solutions, we offer the necessary technical data to support your needs.
Which connection challenge are you currently facing? Is it the inability to conceal the power supply, or inconsistent brightness at the far end of the run? Please leave a comment below, and Mingxue’s technical team will provide you with personalized answers!
Published by Mingxue Lighting | Founded 2005 | Shenzhen R&D Center + Foshan Manufacturing Base | 24,000 sqm | ISO 9001 Certified


